Deploy a configured GKE cluster
Let’s begin with the instantiation of a Kubernetes cluster with a managed version of Istio in Google Kubernetes Engine.
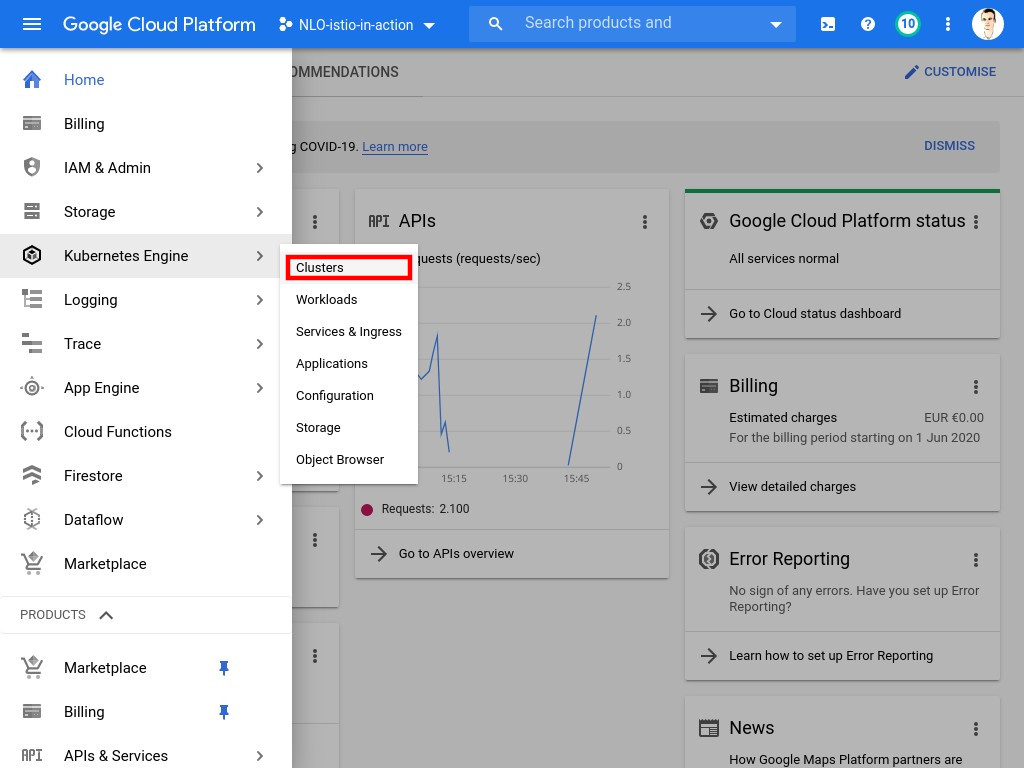
Kubernetes engine
Kubernetes Engine is Google’s managed service for running Kubernetes clusters. You can access it’s dedicated section through the main menu as shown:
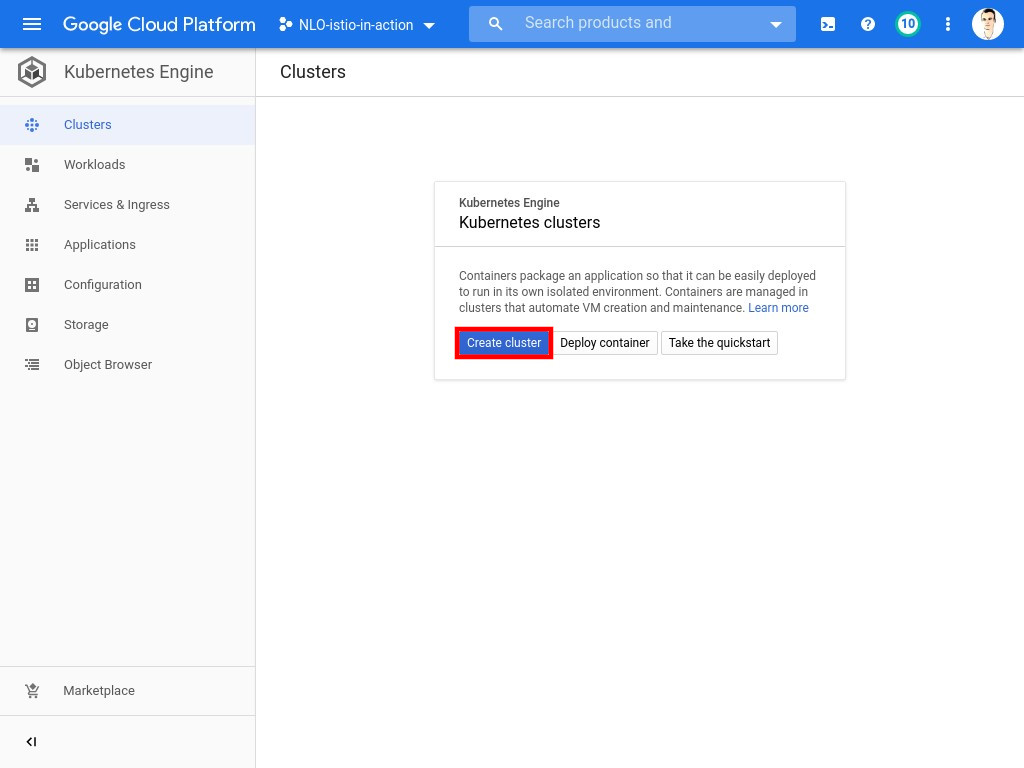
Cluster creation
| You may either create the cluster within the cloud console or using the command line. Since it takes a few minutes for the cluster to be up and running, we recommend you to go with the command line at first. While waiting for the job to be done, you can take a look at the UI and how to spawn a cluster from there. |
Using the gcloud command line interface
To open the Google Cloud Shell, click on the button located in the console header as shown:
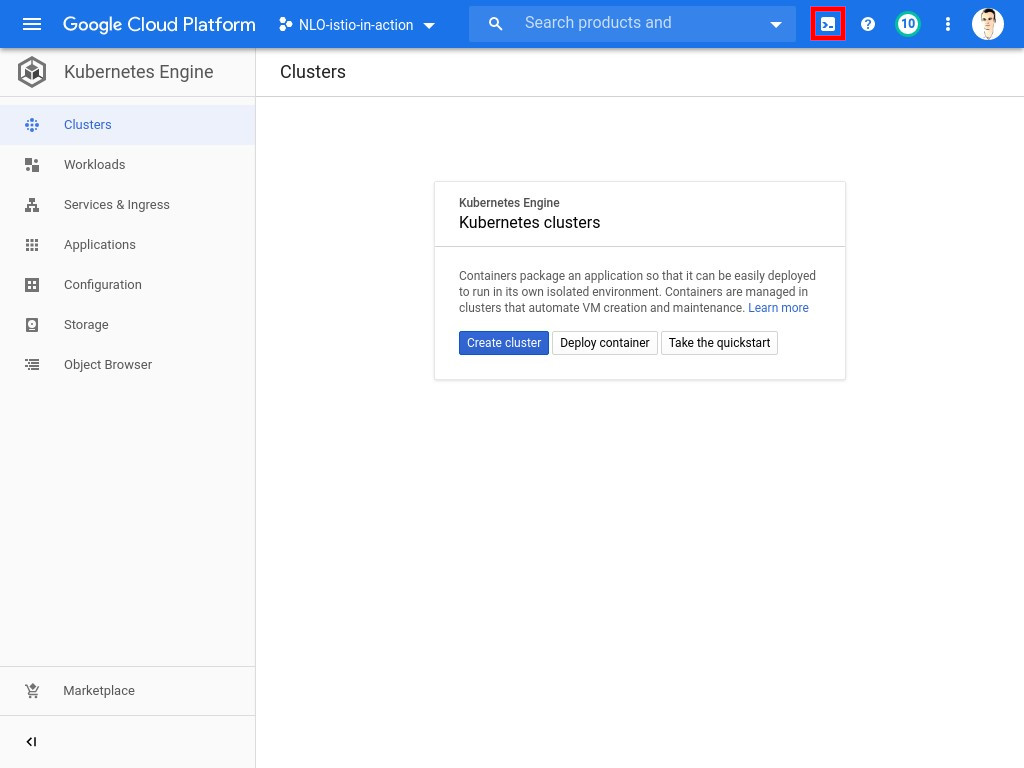
|
You will need your project ID to perform those commands. If running in Google Cloud Shell, it should be
available in the If it is not set , you can determine your project ID by listing all the projects you have access to with: |
# If you are running outside of Cloud Shell or had to determine the project ID yourself, change to next line accordingly
Λ\: $ export PROJECT_ID="${DEVSHELL_PROJECT_ID}"
Λ\: $ gcloud config set project "${PROJECT_ID}"Λ\: $ gcloud beta container clusters create "istio-formation" \
--zone "us-central1-c" \
--release-channel "regular" \
--machine-type "n1-standard-2" \
--image-type "COS" \
--num-nodes "8" \
--enable-stackdriver-kubernetes \
--enable-ip-alias \
--addons HorizontalPodAutoscaling,HttpLoadBalancing,Istio \
--istio-config auth=MTLS_PERMISSIVEWARNING: Starting with version 1.18, clusters will have shielded GKE nodes by default.
WARNING: The Pod address range limits the maximum size of the cluster. Please refer to https://cloud.google.com/kubernetes-engine/docs/how-to/flexible-pod-cidr to learn how to optimize IP address allocation.
Creating cluster istio-formation in us-central1-c... Cluster is being health-checked (master is healthy)...done.
Created [https://container.googleapis.com/v1beta1/projects/kda-istio-in-action/zones/us-central1-c/clusters/istio-formation].
To inspect the contents of your cluster, go to: https://console.cloud.google.com/kubernetes/workload_/gcloud/us-central1-c/istio-formation?project=kda-istio-in-action
kubeconfig entry generated for istio-formation.
NAME LOCATION MASTER_VERSION MASTER_IP MACHINE_TYPE NODE_VERSION NUM_NODES STATUS
istio-formation us-central1-c 1.18.12-gke.1210 34.70.233.150 n1-standard-2 1.18.12-gke.1210 5 RUNNINGWithin Google Cloud Console
| If you created the cluster using the command line in the previous section, you may skip this chapter and go directly to the next one. |
-
Click on Create cluster
-
You will need:
-
A name:
istio-formation -
A location:
europe-north1-a -
A version of GKE: pick the
rapidrelease channel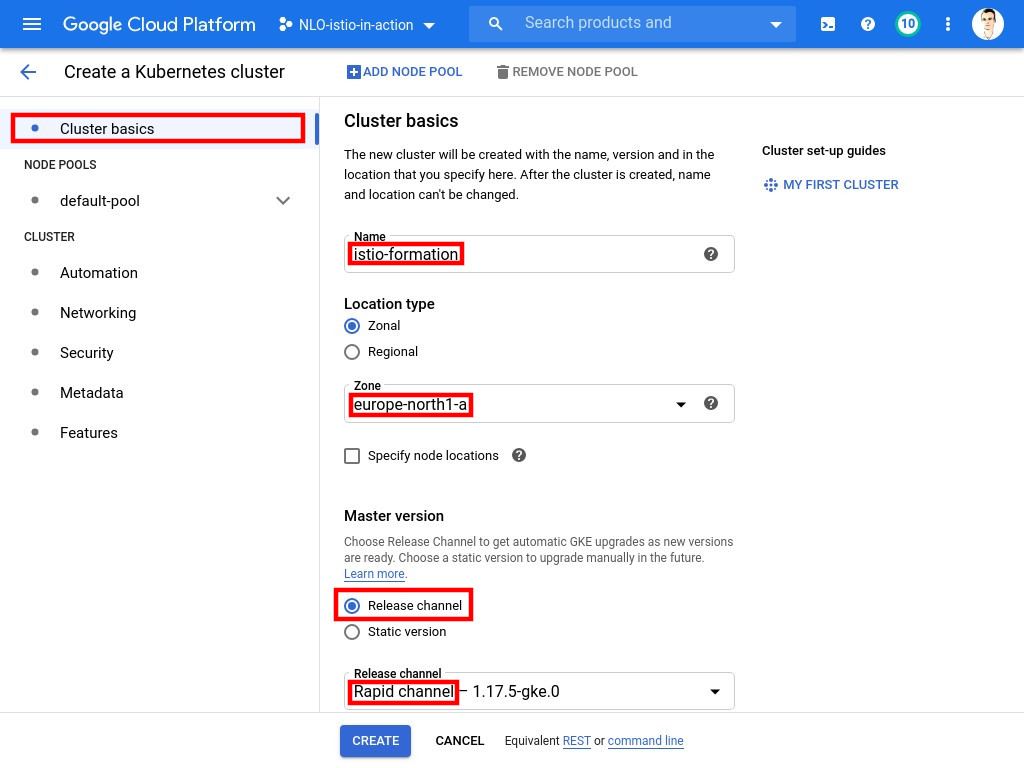
-
-
Before looking into the additional features, you need to set a few parameters in the
Node poolssection:-
Set the Number of Nodes to
5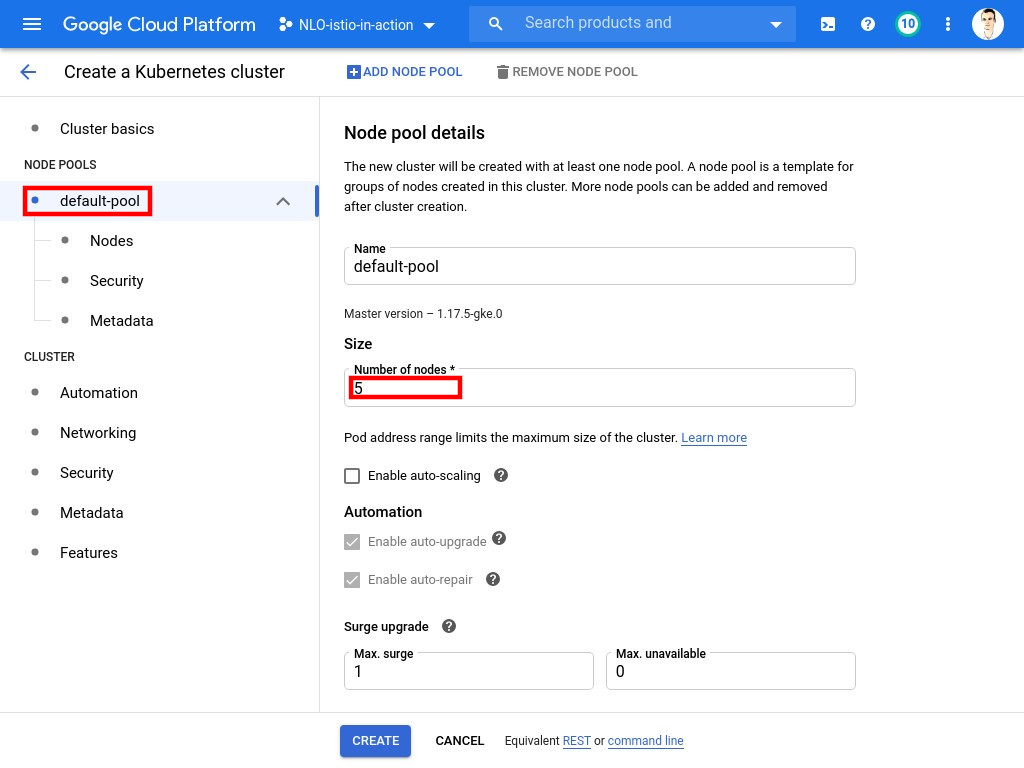
-
Pick a
2 vCPus / 7.5 GB memoryMachine Type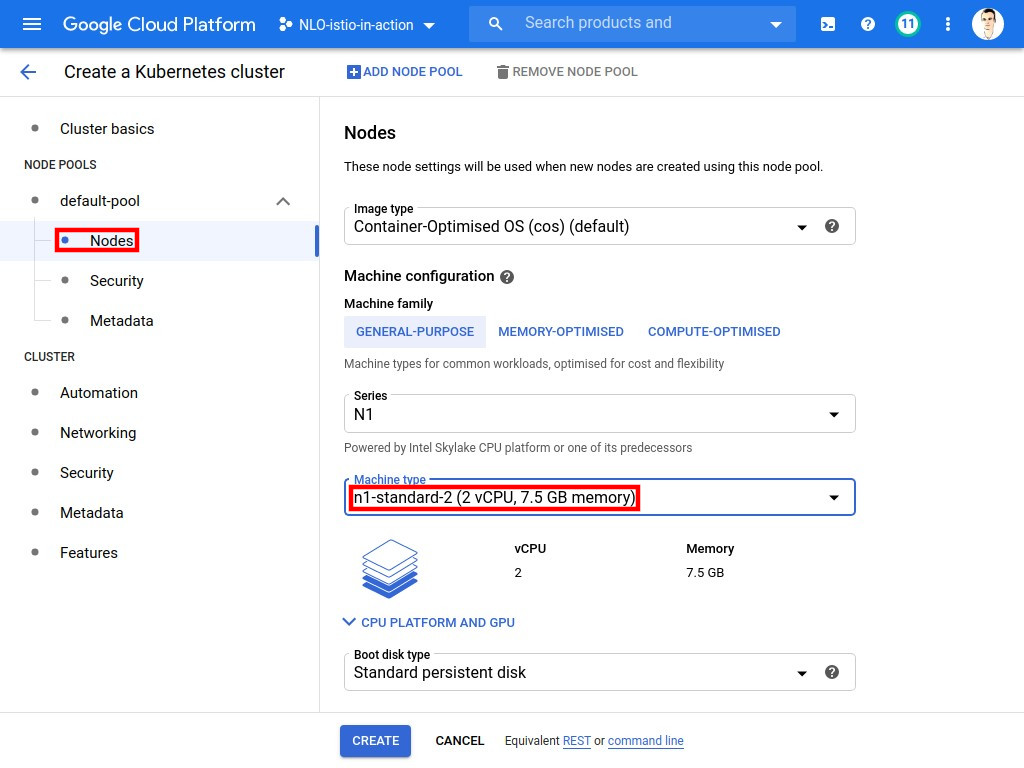
-
-
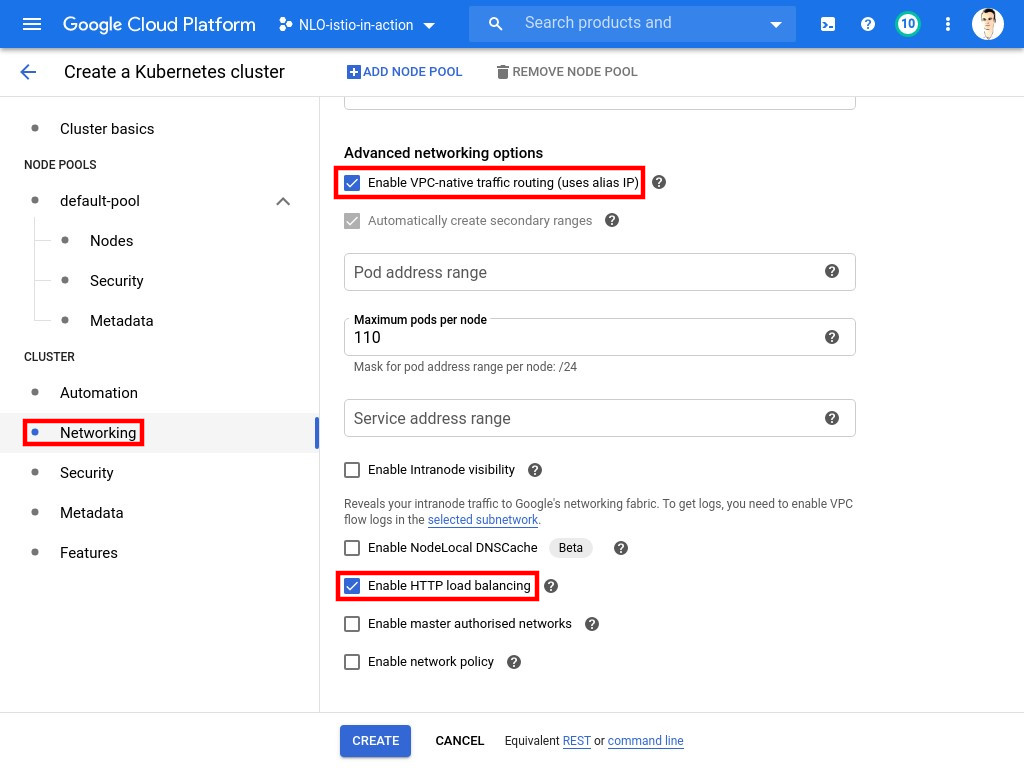
Once the additional features are opened, verify that you have the following Networking options enabled:
-
VPC Native (using alias IP)
-
HTTP load balancing
-
-
Finally, before clicking on Create, you will need:
-
To enable Kubernetes Engine Monitoring
-
To enable Istio in the
Permissivemode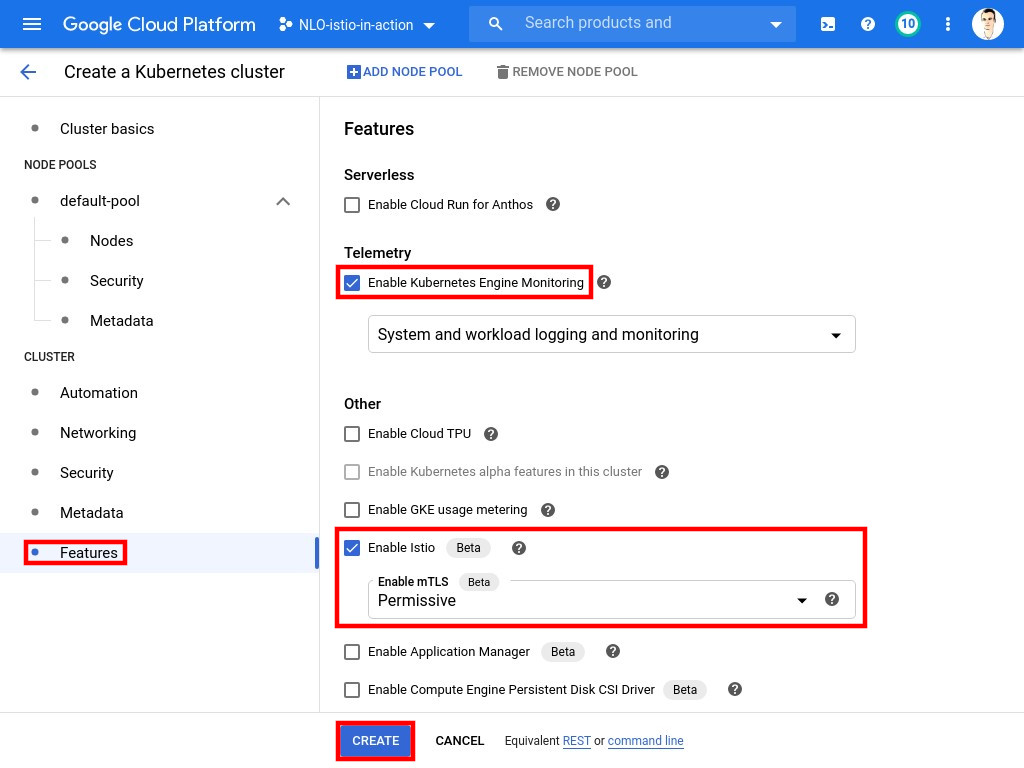
-
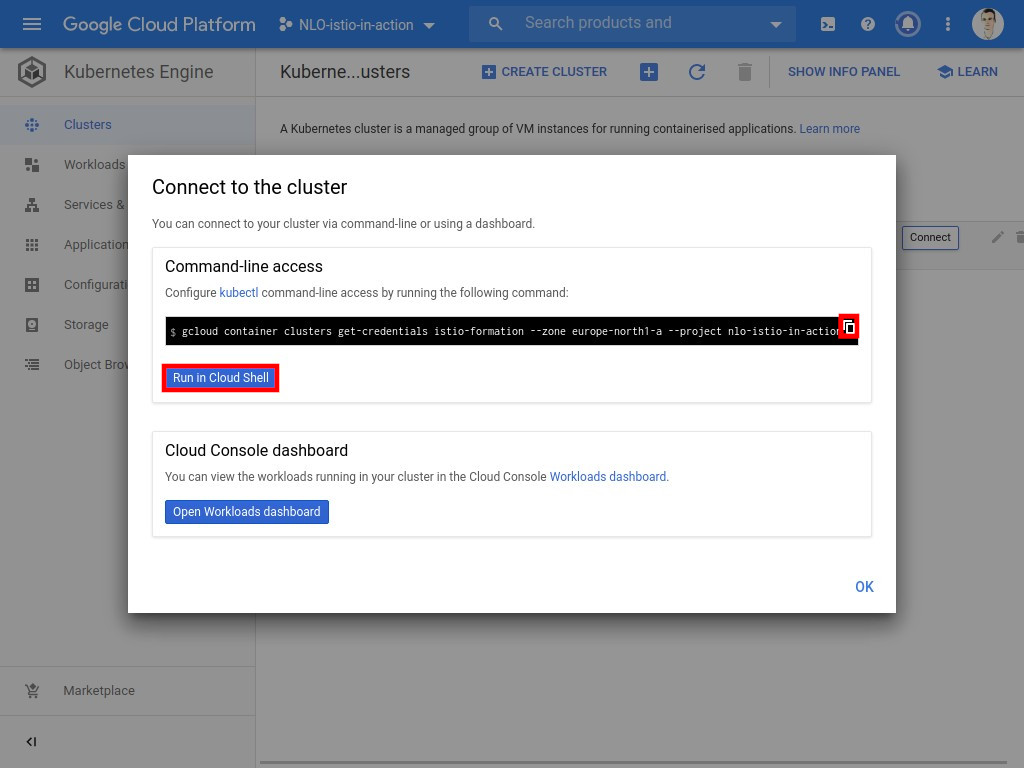
The cluster creation may take a few moments. Once finished, you need to establish a connection. Click on the Connect button next to the cluster in the console.

-
Copy/paste the command inside Cloud Shell or in your terminal.